Getting Started
Do I Need an Account? Make an Account PIA Made an Account for Me I'm a New Agency/Company Admin Register for an Event (as a User)Registering for an Event
Before we begin, there is a very important piece of information you should know:
Many participants and agencies/companies were imported from the old PIA NE/IA system.
If you are the licensing coordinator, owner, or 'in charge' of an agency/company...
and if your agency/company has registered people for events with PIA NE/IA in the past, there is a good chance that your agency/company and previously registered employees are already in the system. Contact PIA to check and to get admin access. (This may significantly reduce the amount of data you'll have to enter.)
Let's get started
First, log in or make an account.
Click on the title of the event to view more information.
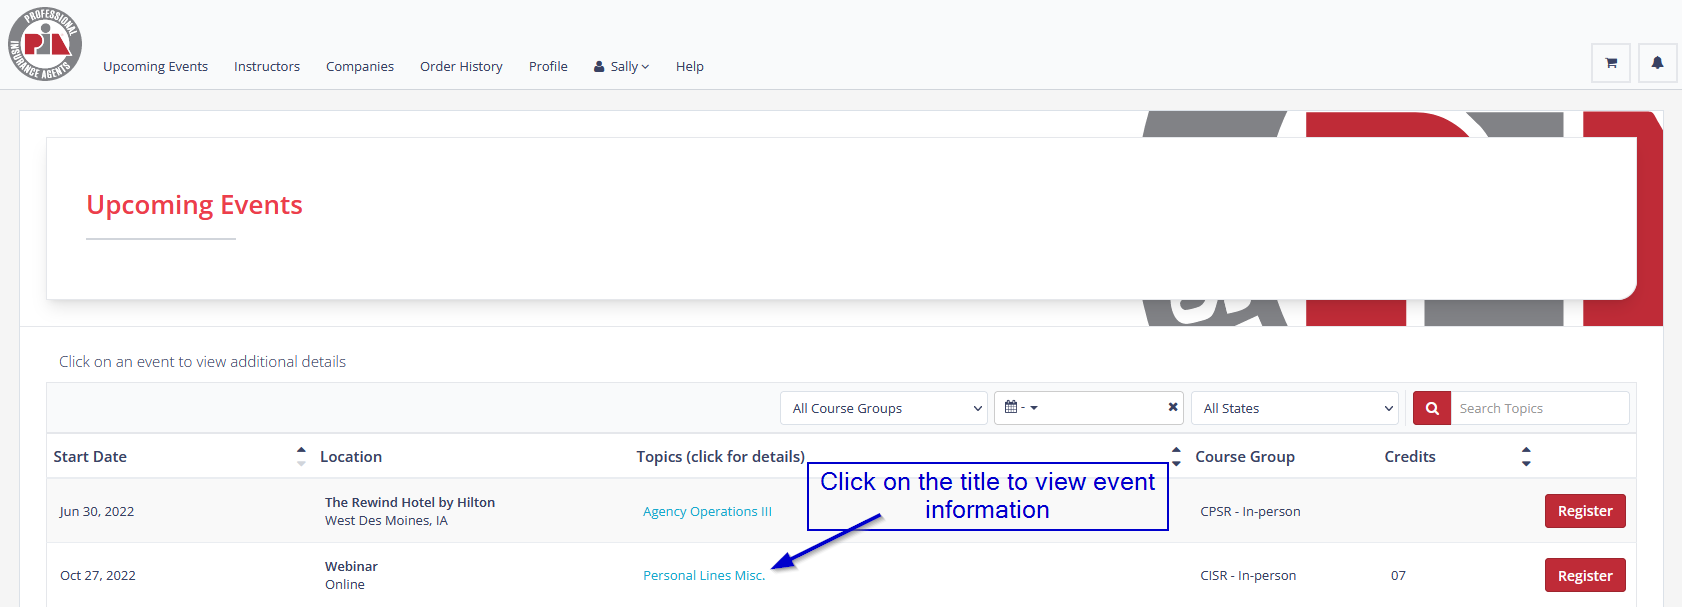
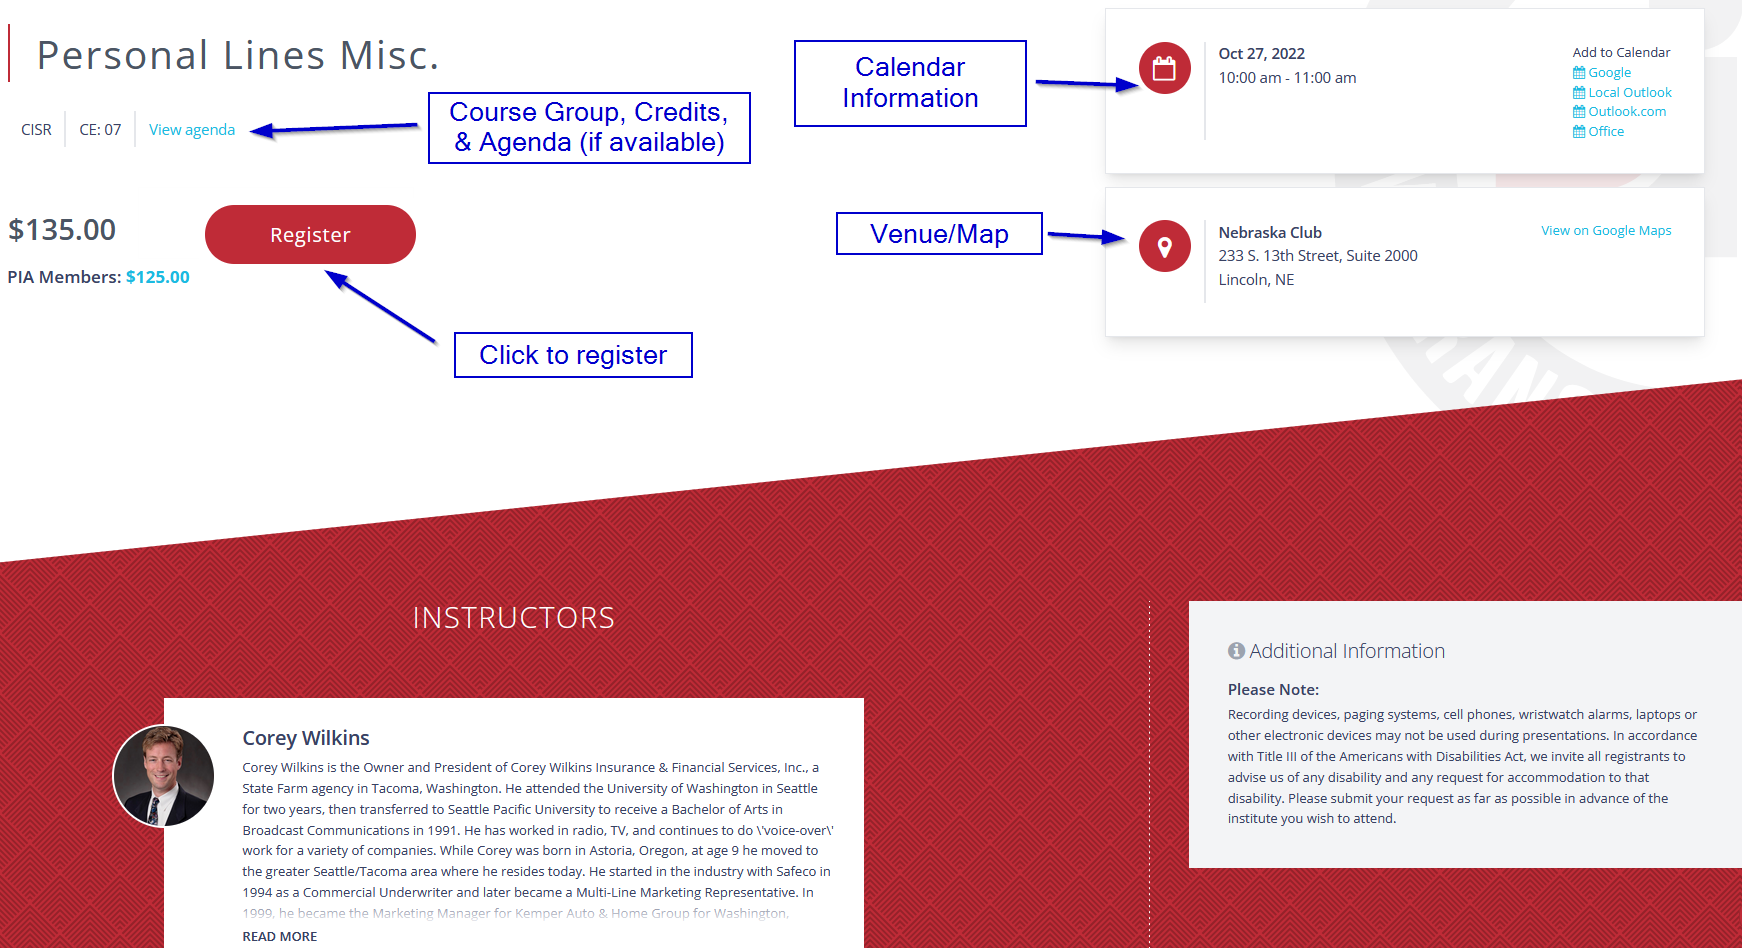
A window with event information will appear.
This page contains:
- the course group and CE credits of the event
- calendar information and links to download calendar appointments to Gmail, Outlook, and Yahoo
- the venue/location information, and link to a map
- the agenda, if available
- registration information
- the instructor(s) of the event/class
- additional information
- alternative suggestions for similar events (bottom of page)
Click on "Register" to continue
Select the participant(s) you wish to register for the event. First and last class mark the first/last class for the participant's designation (e.g. CIC, etc.).
The state listed will be the state for which the participant gets credit.
Make sure the rate is accurate (member vs. non-member rate). If you have been offered an alternative rate by PIA, please contact PIA to have the rate adjusted.
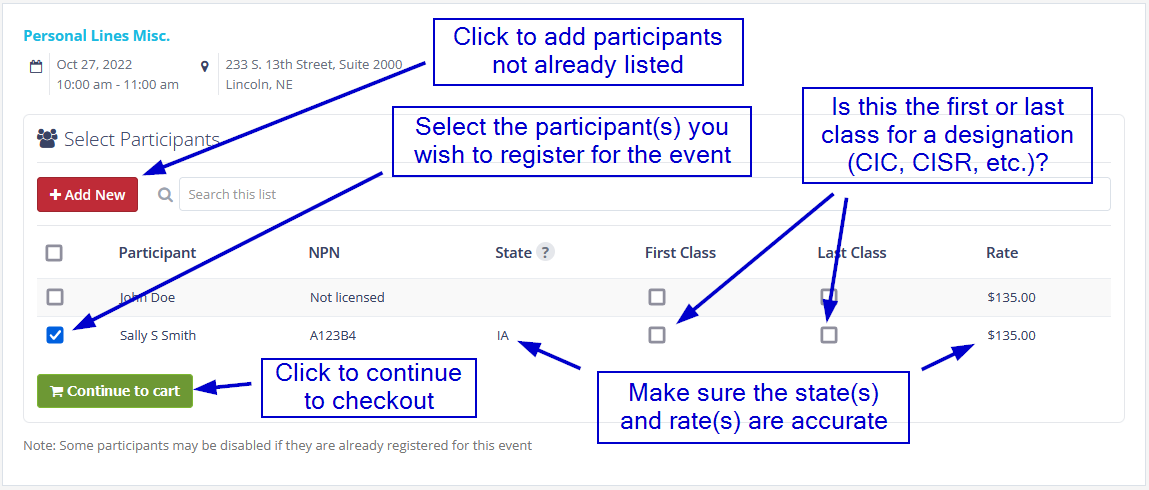
Click "Continue to cart"
On the cart page, either click on "Add an event" to return to the events page and add registrations for other events, OR select a payment method and check out.
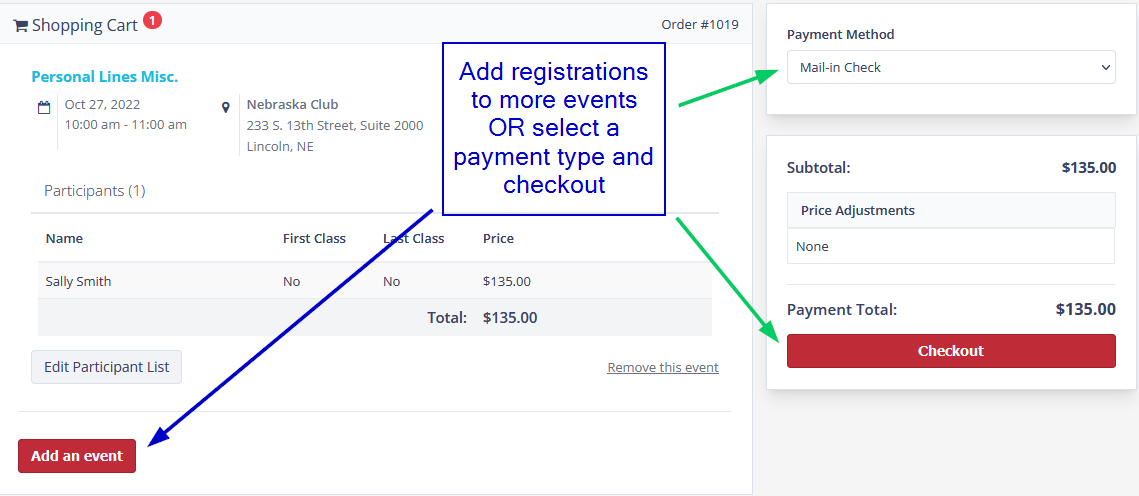
Payment Method
On the cart screen, there are two payment method options: 'Card or eCheck' and 'Mail-in Check'. For the mail-in check option, keep reading, for the card/eCheck option, go here
Mail-in Check Method
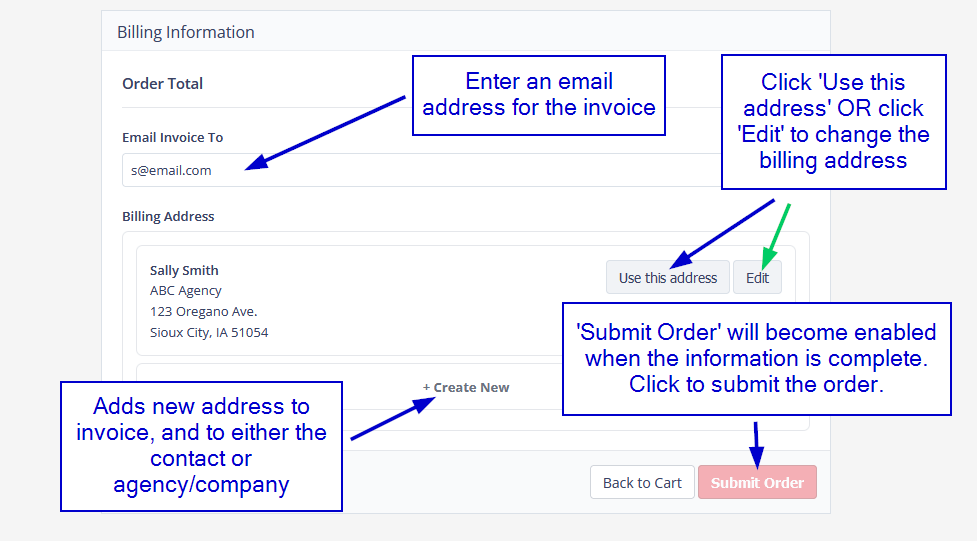
The billing page requires an email address for the invoice (this will likely be pre-filled), and a billing address. Click "Use this address" to select the address displayed, or click 'Edit' to change the address.
'Edit' will edit the address wherever it is used in the contact and/or agency/company profiles
'Submit Order' will become enabled when the information is complete. Click on it to submit the order.
to skip to the rest of the instructions, click here
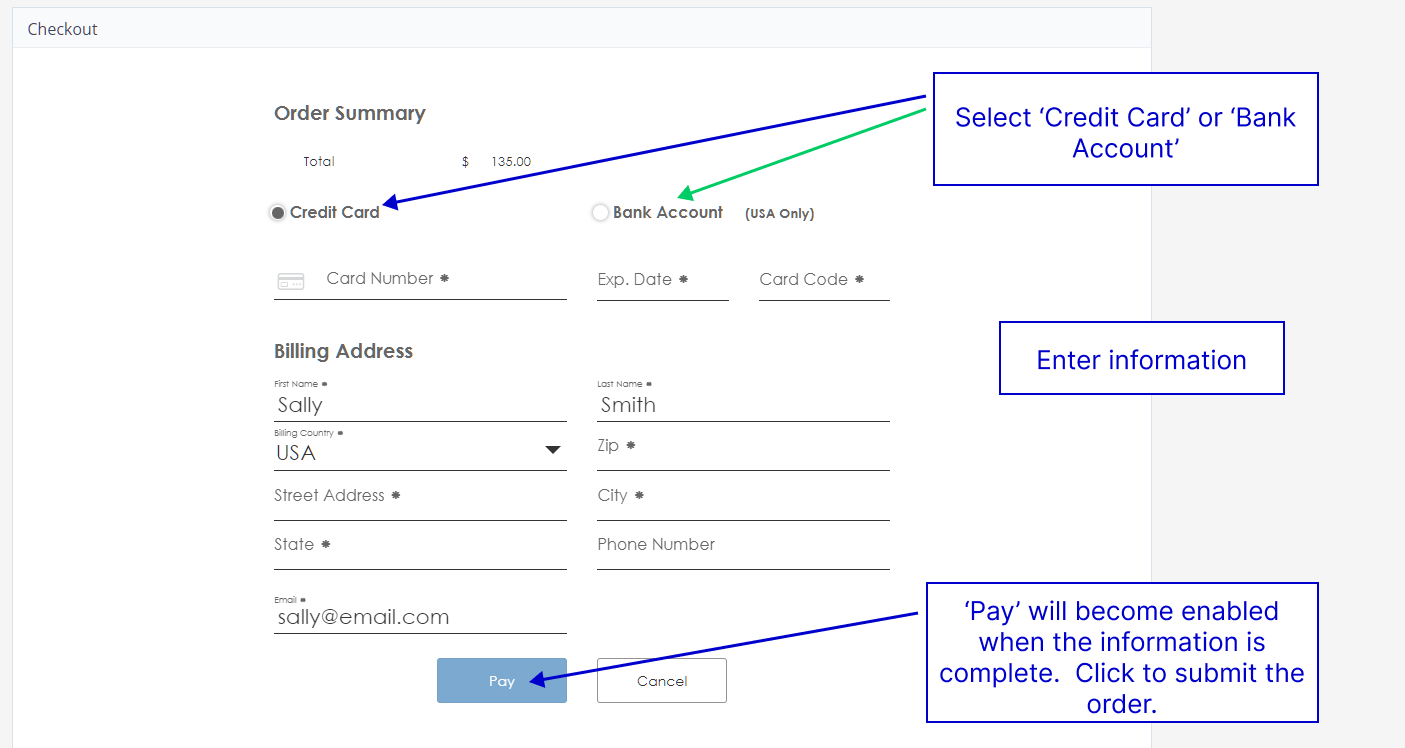
Card or eCheck Method
If "Card or eCheck" was selected, there will be a different page for entering payment information.
Select 'Credit Card' or 'Bank Account', then enter the appropriate information.
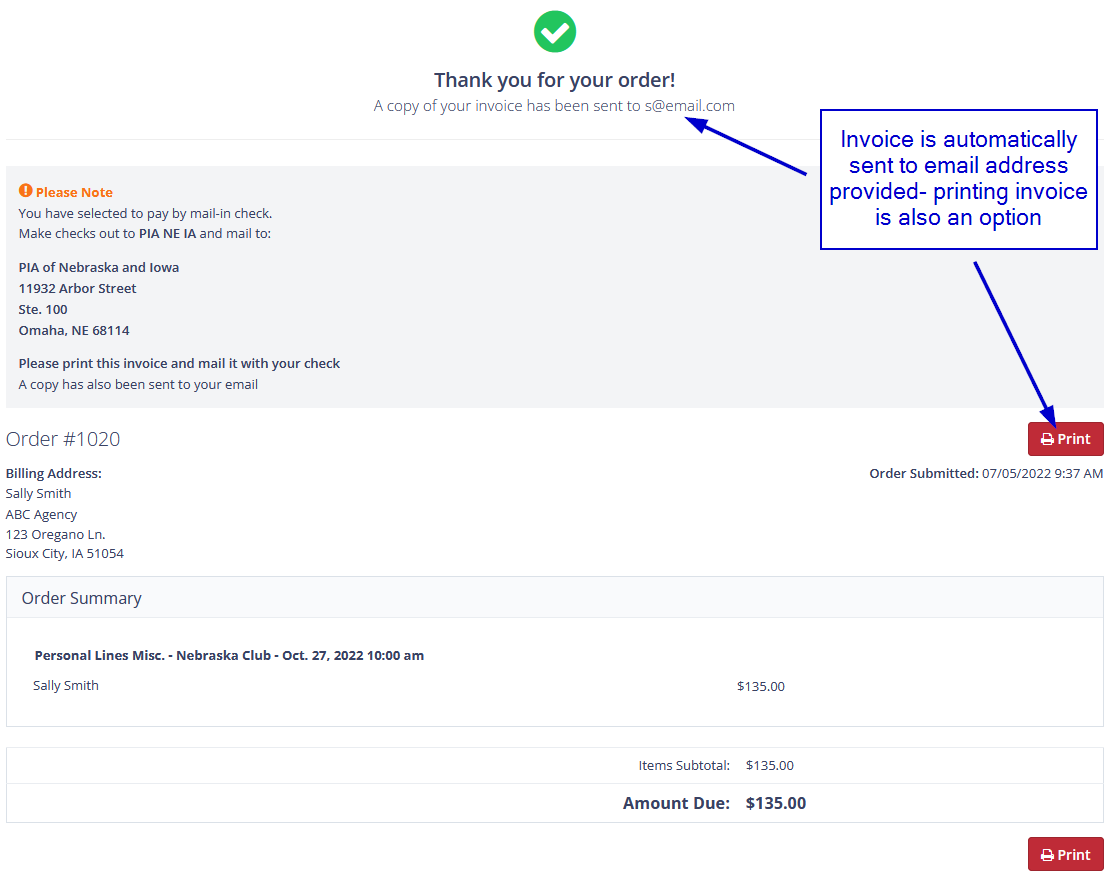
Invoice
The invoice is automatically sent to the provided email address. Printing the invoice is an additional option.
Your invoice may look different than the one below if you submitted your order as a card or eCheck order.